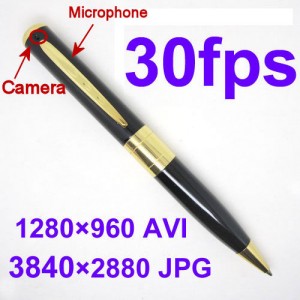
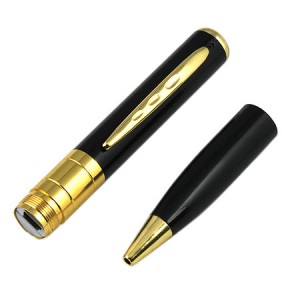
There are some interesting spy pen cameras floating about on the Internet, nifty toys capable of both photo and video.
   |
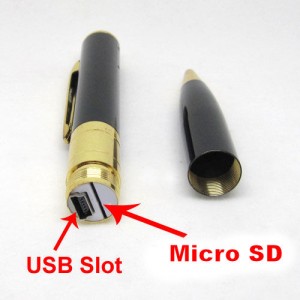
Some of the cheaper Chinese models can be had off eBay for less than $15. The cheapest of these toys don’t include memory, but rather, allows you to use your own micro SD memory stick to record up to 8GB of photos and videos. With each JPG weighing in at ~400k, that’s quite a few photos. I did mention it’s only $15, right? And did I mention that this spy camera pen also writes? Dick Tracy never had it so good!
For a $15 camera of any kind, let alone a spy camera, I’d have to say I’m surprised the video and photo quality aren’t worse than I thought it would be. Granted, it’s not as good as a cell phone’s camera, but still, it could be worse. Pay no attention to the megapixel resolution since the image is so splotchy you wouldn’t want to use the maximum resolution.
As with most electronics from China’s bottom drawer, the spy camera pen comes with near-useless “Chingrish” instructions. This article will attempt to make up for this unfortunate situation.
Spy Camera Instructions
If you connect a standard mini USB cable to the pen, it mounts as a drive letter enabling you to treat the contents of the micro-SD card like a regular flash drive. No drivers or complicated procedures needed. So far, so good.
In order to be discrete, the device has one and only one button. Thankfully, it’s conveniently located at the top of the pen. Having one button is both a positive and a negative: you have only one button to worry about, but have to try and remember all the different ways of pressing the button in order to get it to record photos and videos. Some clear instructions are needed.
The camera operates in two modes: camera mode and video mode (it also has “hard-drive mode” when the USB cable is used to connect it to your computer). Since the unit only has one push-button to control all operations and one blue status light, changing modes can be somewhat tricky.
Camera Ready Mode
- Press the button and hold it for ~2 seconds until the blue light comes on, then release the button. (Don’t hold for more than 10 seconds or you might reset/erase everything on the memory card). You are now in “Camera Ready Mode”.
- The blue light will stay ON solid while the camera is in “Camera Ready Mode”. Press button as often as needed to take photos. The blue light will turn off momentarily while the image is being recorded to the micro USB memory stick. As with any camera, you’ll get better photos if you hold it still while taking photos and videos.
- While in “Camera Ready Mode”, you can either …
- Change to “Video Mode”: Hold the button for ~3 seconds and the light will turn off. Release the button and the light will blink 3 times and then turn off. You are now in “Video Mode” . (Go to the “Video Mode” section of the instructions).
- Turn off the camera: Hold button for ~6 seconds until the light turns off (for 2 seconds), turns on (for 2 seconds), then turns back off. You may now release the button. The camera is now turned off.
Video Mode
If you haven’t read the steps for “Camera Ready Mode”, please start there, then continue here.
- When the camera is switched to video mode, the light will blink 3 times and will then turn off. You are now in “Video Mode”. WHILE THE LIGHT IS OFF, YOU ARE RECORDING VIDEO! According to the instructions, a fully charged battery should be able to record about 60 minutes of video. (I haven’t tested the duration to confirm it.)
- While in “Video Mode”, you can either …
- Stop recording and change to “Camera Ready Mode”: Press the button once. The blue light will flicker briefly (to end the video session) then come on solid, letting you know you are now in “Camera Ready Mode”. (Go to “CAMERA READY MODE”)
- Stop recording and turn off: Press and hold the button for about 5 seconds. The blue light will flicker briefly (to end the video session) then come on (for 2 seconds) and then turn off. As soon as it turns off, release the button. The camera is now turned off.
Reset
There are two ways to RESET the camera and erase the contents of the memory stick. EVERYTHING ON THE MEMORY STICK WILL BE ERASED, INCLUDING ANY OTHER FILES (MP3, etc) THAT ARE ON THE MEMORY STICK. Think of this as an “oh, crud! I got caught. I better dump the evidence” feature. (For what it’s worth, I tried undeleting some erased photos and videos using some fairly advanced (as in “not freebie”) software. I was able to recover a bunch of previously erased MP3s on the memory stick, but I couldn’t recover any JPGs and AVIs that I had recorded using the camera pen. So beware of the Reset feature.)
- While the unit is off, press and hold the button for 20 seconds. When you release the button, the blue light will flash ~7 times and will erase everything on the memory stick. The directories required for photo use will be left intact. The date will not be changed.
- Use a paperclip to press the reset button (I haven’t tested this)
Setting the Date and time
Like any good digital camera, this spy camera keeps track of the date and time, recording the date and time in the file properties. The spy pen camera can also stamp the date/time in the bottom-right corner of the photos and videos it records. Setting the date and time is a bit interesting, but not difficult.
- Using a text editor such as Notepad, create a simple text file named “time.txt” and save it in the root directory of the micro SD memory stick. The file should have one line only, containing the current date and time in the following format:YYYY.MM.DD HH:MM:SS X, where “X” determines whether you want the timestamp to appear on the video images.
Use ‘Y’ to include the time in the video/photo images.
Use ‘N’ to prevent the time from being recorded on the video/photo images.
For example, the following will set the camera’s clock to January 5, 2016, 5:25:35 PM, and have the timestamp displayed in the bottom-right corner of each photo and video:2016.01.05 17:25:35 Y
- Once the file has been saved to the root directory of the micro SD memory stick, unplug the camera from your computer, turn the camera on and it will read the “time.txt” file, make the appropriate changes, and then delete the file.
So, there you have it. A nifty spy camera pen that lets you take photos and video discretely. The camera’s pinhole is located above the pen clip, so you can wear the pen in your pocket while recording photos, video and audio. You won’t take any photos worth framing, but you may catch some juicy video footage worth keeping.
