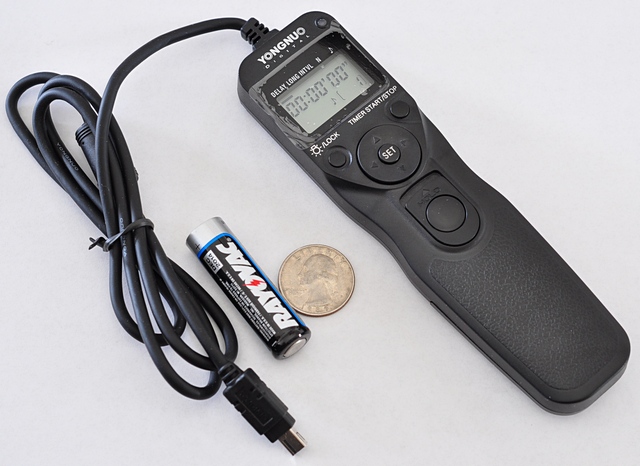
 Yongnuo MC-36B (Right-click and select ‘View image’ to see a larger photo. Quarter and AA shown for scale.) |
If you want to jazz up your Nikon’s abilities by adding a remote shutter control that doubles as an intervalometer – but would rather shell out $20 and not $140 for Nikon’s MC-36 – then there are some remote shutter controls on eBay that may be worth your attention.
One such unit is the Yongnuo MC-36b. Measuring in at a scant 6″, this nifty 2-oz toy does an awful lot for almost 1/5 the cost of the Nikon equivalent. Control buttons are clearly marked, intuitive and responsive. With the included 2 Duracell AAA batteries, the Chinese unit makes a handy asset to any photographer’s bag. For less than $20, shipping included, my little Chinese gadget was delivered with the usual Chinese promptness. Gotta luv eBay! (There are different versions available to support Canon, Sony, Pentax and other cameras, so be sure to read your product description closely before ordering since your camera will require a specific plug – and, more importantly, not all cameras can accept a remote shutter.)
What is it and why do I need one?
Every now and then you’re going to want to take a photo and use a tripod to hold your camera as still as possible to avoid any motion blur. However, pressing your camera’s shutter button will cause the camera to move ever so slightly, potentially inducing a tad bit of blur. The remote shutter control is just the toy you need to rectify the situation. Plug this doodad into your camera and now, instead of exerting blur-inducing force on your camera just to push the shutter, you push the shutter button on the remote and – voila: no camera movement.
But let’s take that idea to the next level – what if you want to press that button every, say, 5 minutes for the next 3 hours so you can do some stop-motion photography of the moon tracking through the night sky? You could have your kid perform this menial task, but with ADD all the rage these days, it’s a given that he’ll be distracted before the series of photos is complete. So that’s what an intervalometer is for – and the Yongnuo MC-36b does that too! That’s why you really need this baby.
How to use it
Using the remote couldn’t be easier:
- Plug the remote into your camera.
- When you’re ready to take a picture, press the shutter button (large button in the center of the remote). See! Told you it was easy.
Additionally…
2a) If your camera is in BULB mode, the shutter will stay open as long as you’re pressing the shutter button.
2b) If you want to walk away from the camera and leave the shutter open, press the shutter button and slide it forward into the ‘hold’ position. (The button can slip back out and end your exposure if you’re not careful. I’m not sure if that’s a design flaw or just my unit.)
Simple enough to operate, right?
As you might imagine, it gets a little trickier when you’re trying to use the intervalometer. Understanding how to use the intervalometer is not terribly difficult, but having the manual in “Engrish” certainly doesn’t help much. It features a diagram much like this one, and is actually quite helpful.
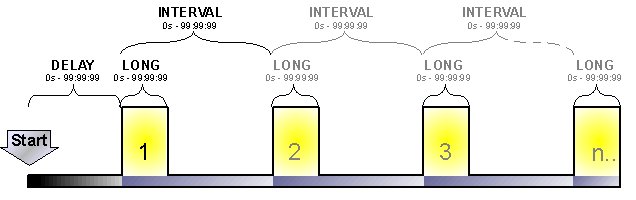
Just in case this diagram doesn’t make sense, time goes from left to right. When taking multiple photos in a sequence, an intervalometer controls 4 parameters:
- Delay – The amount of time between the press of the ‘Start’ button and the first photo. This time can range from 0 seconds to 99 hours, 99 minutes and 99 seconds (100 hours and change, basically). I’d think that it was 99:59:59, but the manual says otherwise. I haven’t tested it. Surely when counting down, it uses 59 seconds and 59 minutes.
- Long – The amount of time for your shutter to be open. This time can range from 0 seconds to ..uh.. 99 hours, 99 minutes and 99 seconds.
- Interval – The amount of time from when the first photo exposure begins to the time when the 2nd photo exposure begins.
- Number – The number of photos you want the intervalometer to make. This can be from 1 to 400. I believe it can be set to infinity, but I ..uh.. haven’t tested that in order to confirm it.
Brief operating instructions for the MC-36b
If you ignore the protective plastic ‘tape’ on the face of the display pictured on the right, you’ll notice that the Yongnuo MC-36b has a LED in the top-right corner, an LCD timer display (where the cursor is underlining the word “DELAY”), a light/lock button, a start/stop button, a set/cursor-move button and a shutter button. The shutter button can be made to stay down by pressing it down and sliding it upwards.
To change the values for the Delay, Long, Interval or Number parameters, simply press the right/left arrow to move the cursor to the parameter you want to change. Press the SET button and you can now change the hours/minutes/seconds values by pressing the up/down buttons. When entering the time value, each time unit (hour:minute:second) can be set independently: simply press the left/right button to move back and forth between the units as needed.
You can also turn off the beeper by moving the cursor to the far right so as to underline the icon of the musical note. Pressing the up/down arrow button toggles the audio setting.
Pressing the light/lock button turns on the backlight for the LCD display. Handy when making night-time shots.
 Once you’ve set in values for the MC-36b, you’re ready to go. Press the START button, and you’re in business.
Hacking the unit
For long-exposure images, the MC-36b does allow you to program an exposure of ..uh.. 99:99:99 (let’s just call it 100 hours). Although I’ve never tested it, somehow I get the feeling that the two AAA batteries would be exhausted when making an exposure that long. (Nevermind that the photo would look like mush. But, hey! It can count that high, so why not?) Just hack the unit to allow an external power source (AA battery pack with more mA, etc) and you’re home free, right?
If you have any ideas about hacking the unit, there is a little bit of space inside to allow for a jack so you can use an external power source should you be so inclined. Simply remove the six screws holding the unit together and you’re ready to hack to your heart’s content. One idea I’m considering is adding a simple power switch. The unit doesn’t have a way to turn it off. The manual says to just make sure it’s not in Active mode, sending signals down the cable to trigger the camera. Sure, it sips so little energy I suppose it’s not needed, but still, I’d sleep better knowing that the unit is turned off.
Summary
All in all, I’d have to say I’m pretty impressed with this little unit. Quality of construction isn’t top-notch, but it’s certainly better than some of the other Chinese junk I’ve purchased in the past. For just $20 or so, it’s pretty hard to go wrong with the Yongnuo MC-36b. Get one now before the rest of the world finds out about these babies and prices sky-rocket when the world sees how awesome your time-lapse photography looks. Even if you’re not into time-lapse photography, the timed remote feature is well worth the price of this unit. Remote shutter photography ensures that your camera will be as still as possible when taking a photo.
And that can help you take photos worth framing.