A good photograph will have a subject, and as a general rule, you’ll want that subject to be in focus. One method of keeping attention on your subject is to keep your subject in focus and make everything else (usually your background) out of focus.
When this is done in-camera (as opposed to being done in Photoshop), this is referred to as controlling your “depth of field” (DOF). Your DOF is the area in front of and behind your subject that is acceptably in focus. You control your DOF by altering the following:
- Focal length (the more you zoom in on your subject, the more the background is out of focus)
- Distance (the closer you are to your subject, the more the background is out of focus. This also applies to background distance: the further away your background, the more out of focus it will be.)
- Aperture (the wider your aperture, the more the background is out of focus)
For more on the nature of aperture and what it does to your photo, click here.
The quality and smoothness of the out-of-focused items is called ‘bokeh’, and because you can control it, it becomes a compositional element in its own right, right up there with color, pattern, form, texture, shape, etc. In the example above, I was about 10 feet away from the subject and I zoomed in quite a bit on her as she looked out a window (not pictured). I waited till someone walked into the room. He’s about 40 feet behind her, and consequently, was thrown out of focus. By deliberately including someone out of focus, this image now has an element of mystery: we’re drawn to the girl’s face, but our mind occasionally wonders on the identity and behavior of the man in the background.
How to do it
 |
If your camera doesn’t support manual controls, use the “Portrait” setting. Usually this will look like an icon of a lady, or one person in front of another. Set it, get close to your subject, place your backgrounds as far away as possible, zoom in, and click away. The Portrait mode will force your camera’s aperture to be as wide as possible, your feet and your zoom will take care of the rest.
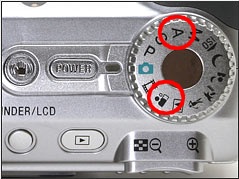
If your camera does support manual controls, set your mode dial to “A” (“Av” on Canon cameras) and use your camera’s control wheel (consult your manual) to set your aperture on its lowest f-stop (aperture). The exact f-stop number will depend on your camera and lens, but for most common DSLR lenses, you’ll expect this number to be around f/3.5, or if you’re zooming in, this number may only go as low as f/6. If you have an dSLR and you really like the whole bokeh thing, spend $100 or so and buy a 50mm f/1.8 lens!
Having fun with bokeh
 |
The smoothness of the bokeh is influenced by your lens’ aperture, and the shape of the aperture influences the way blurry lights are photographed. A round aperture means round blurry lights, and an oddly shaped aperture means FUN! With a piece of cardboard and your printer, you too can make cool cutouts to hold in front of your camera and have fun with bokeh.
How to do it
This effect works especially well for Christmas lights: they’re small and easy to have in the background. And if you’re sitting up late one night watching mindless TV, you can quickly dart up into the attic, hang lights in your dining room, fool around with the technique and have everything back in place before your wife wakes up.
- Using a piece of cardboard, print out a black circle the same size as your lens opening. The black helps prevent light from sneaking in the side and ‘contaminating’ your photo. This PDF has 12 shapes, and the size of the circle should work for most digicams and most dSLR 50mm lenses. If you want to edit them, feel free to download the Open Office version instead.
- Cut a shape in the very center of the circle. You’ll probably want this cutout to be 1/3 the diameter of your lens diameter. This will vary from lens to lens, so some experimentation will be necessary. If you’re going to use several shapes, might as well have them on one long card.
- Mount your camera on a tripod (the small aperture will make your image darker than normal, so to compensate, your camera must keep its shutter open longer. You’ll have to keep your camera still by setting it on something sturdy).
- Hold the card right smack in front of your lens, set your camera so that your background lights are nice and out of focus – and shoot away.
Here are some random samples.
 |
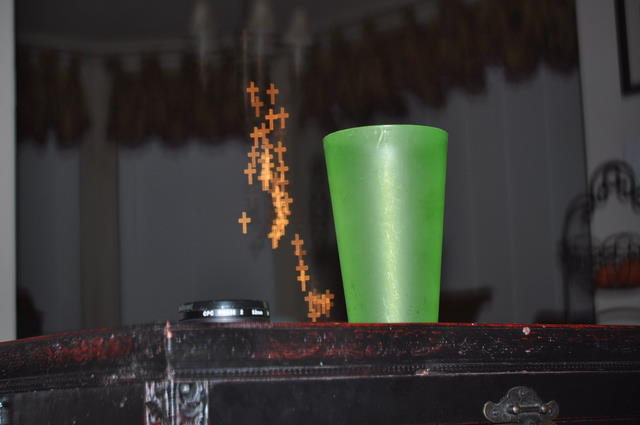
I tried to get the whole manger scene, but that made the lights too small to tell they were crosses.I liked the concept of the manger with crosses in the background. |
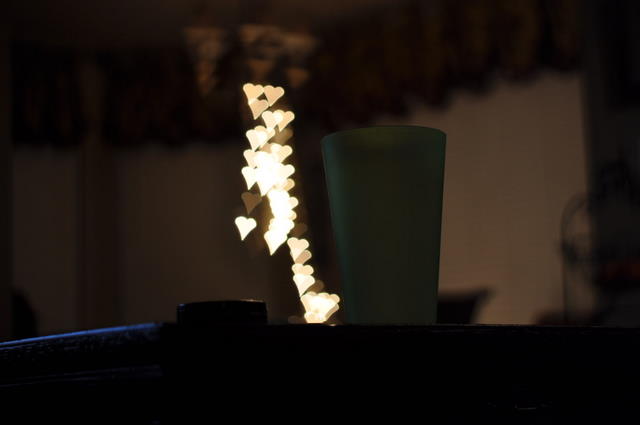 |
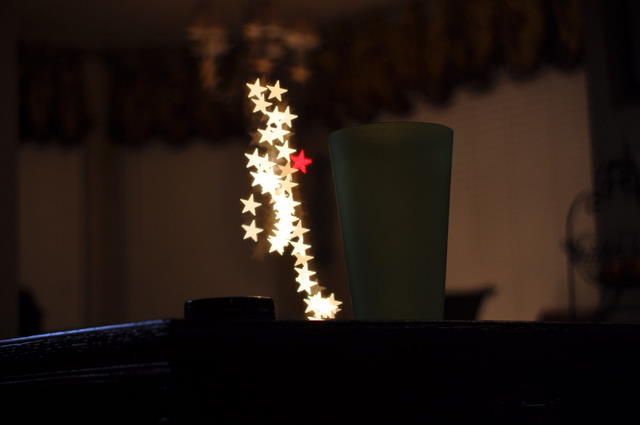
Granted, a cup sitting on a coffee table is hardly an ideal subject, but… |
 |
Shooting a red laser at the wall can add a splash of color. I’ll have to try this with colored Christmas lights. |
 |
In this case, using the flash helps light the foreground – not that the foreground is appealing or anything. |
Conclusion
Knowing how to control the focus of both your subject and your background will help you direct your viewers’ attention and control your composition. Getting crafty with a fake aperture will let you have fun with your lighting.
And that can help you take photos worth framing.
<